Thursday, September 28, 2023
What is Shipverse
ShipVerse serves as a Software as a Service (SaaS) shipping solution that brings orders and shipping services at one place.
In the simplest way, ShipVerse help import your orders from multiple sources, typically online store. For each order, you can decide carrier and shipping services, get best rates and generate labels. As the order progresses, ShipVerse provide updates to your stores, status of shipments and offers tools for tracking deliveries and handling returns.
Ultimately, ShipVerse help streamline your shipping processes by simplifying order accumulation at a place and facilitating label generation. Platforms robust automation capabilities take your time off from repetitive work and help you save most on your shipping bills.
Manage Orders
The primary method for transferring orders to ShipVerse involves importing them from an online store that's connected to the platform. You can easily import orders and related information if your connected stores are ones that ShipVerse directly integrates with, such as Shopify and BigCommerce. Alternatively, if you have a Custom Store crafted by developers, this option is available as well.
Import orders from connected store/Connect with E-commerce platform
Go to Connect a Store option under Onboard. Choose a store type from available option and click on Connect. This will lead you to enter information about your store and add credentials to verify and link the store. Once you get success message, you all set to receive orders in Shipverse. Depending on status of orders, it will show under respective stage in ShipVerse.
Connect Shipping Carrier
Go to Onboard to connect a shipping career. Click on add a career in activate savings on career. This will take you to add a career section where you can select your preferred career and enter information about your account on career website. Once you get success message, you are all set to ship with your career negotiated rates on ShipVerse. Make sure that you are selecting your account number while placing an order on ShipVerse.
Set a Ship from Location
Once you are done connecting your ecommerce platform and your career shipping account, now it is time to add your ship from location, to make sure your orders are getting correct "Ship from/return to" address on shipping labels. Go to onboard section and select "Add another location" in "Set a ship from Location" section. Make sure you're entering all the details including return address if different from pick up address. Once you are done entering all the details, click on save.
Ship Orders
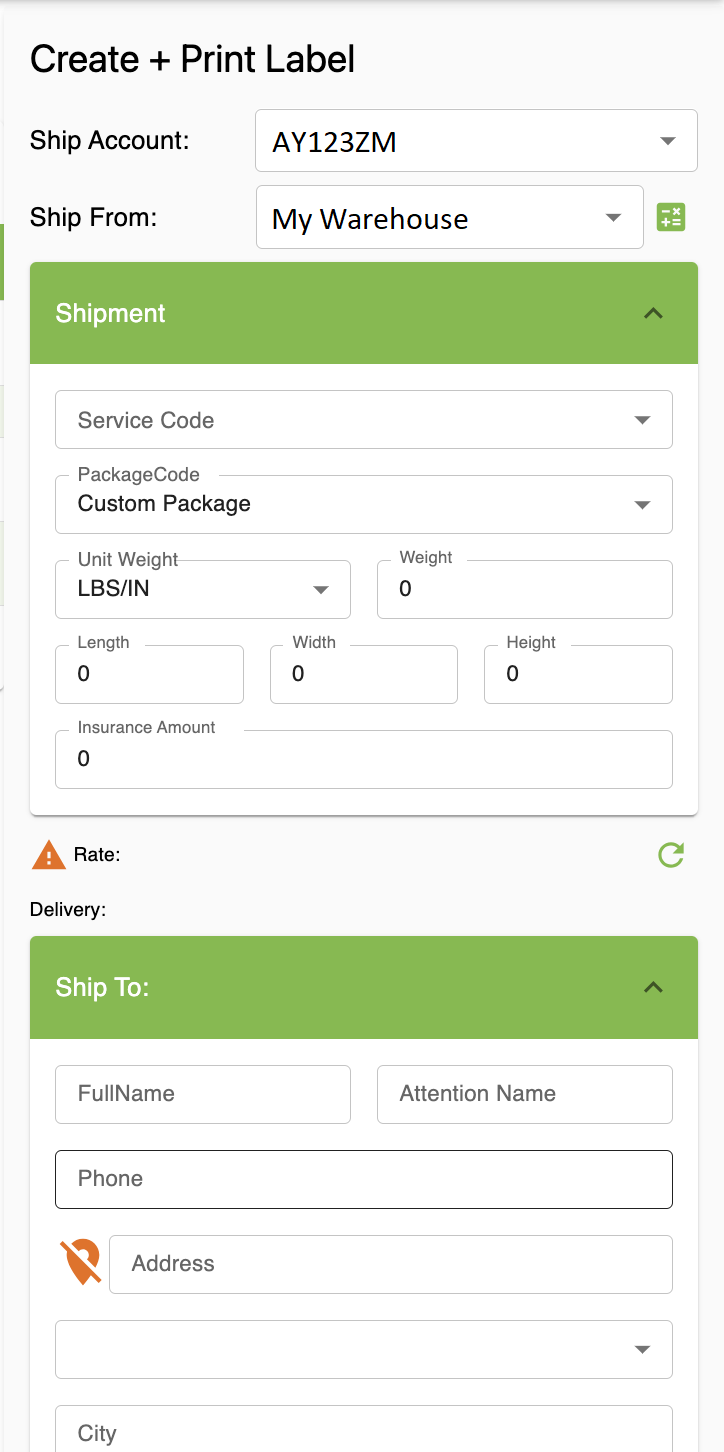
To ship an order, go to orders section on ShipVerse, select an order to ship. Then select "Ship Account" and "Ship From" location according to your needs. The receiver's information in the "Create + Print Label" section should auto populate once you select an order. Enter package weight and package code to provide package dimensions. If you have selected "Custom Package" in package code, also provide the length, width, height and Unit of weight. Select the service code according to the price and service level requirements. To get the cheapest rates automatically, click on refresh button besides rates.
Check the "Ship to" section and validate the address. Provide Tax ID for international shipments. Provide Description of the package, duties and taxes account, international form and customs declaration information for international shipments. Select payment methods according to your needs. Once all the information entered click on "Create + Print Label" option.
Once you have created label, it will pop on the screen, which you can print using your connected printer.
International Settings
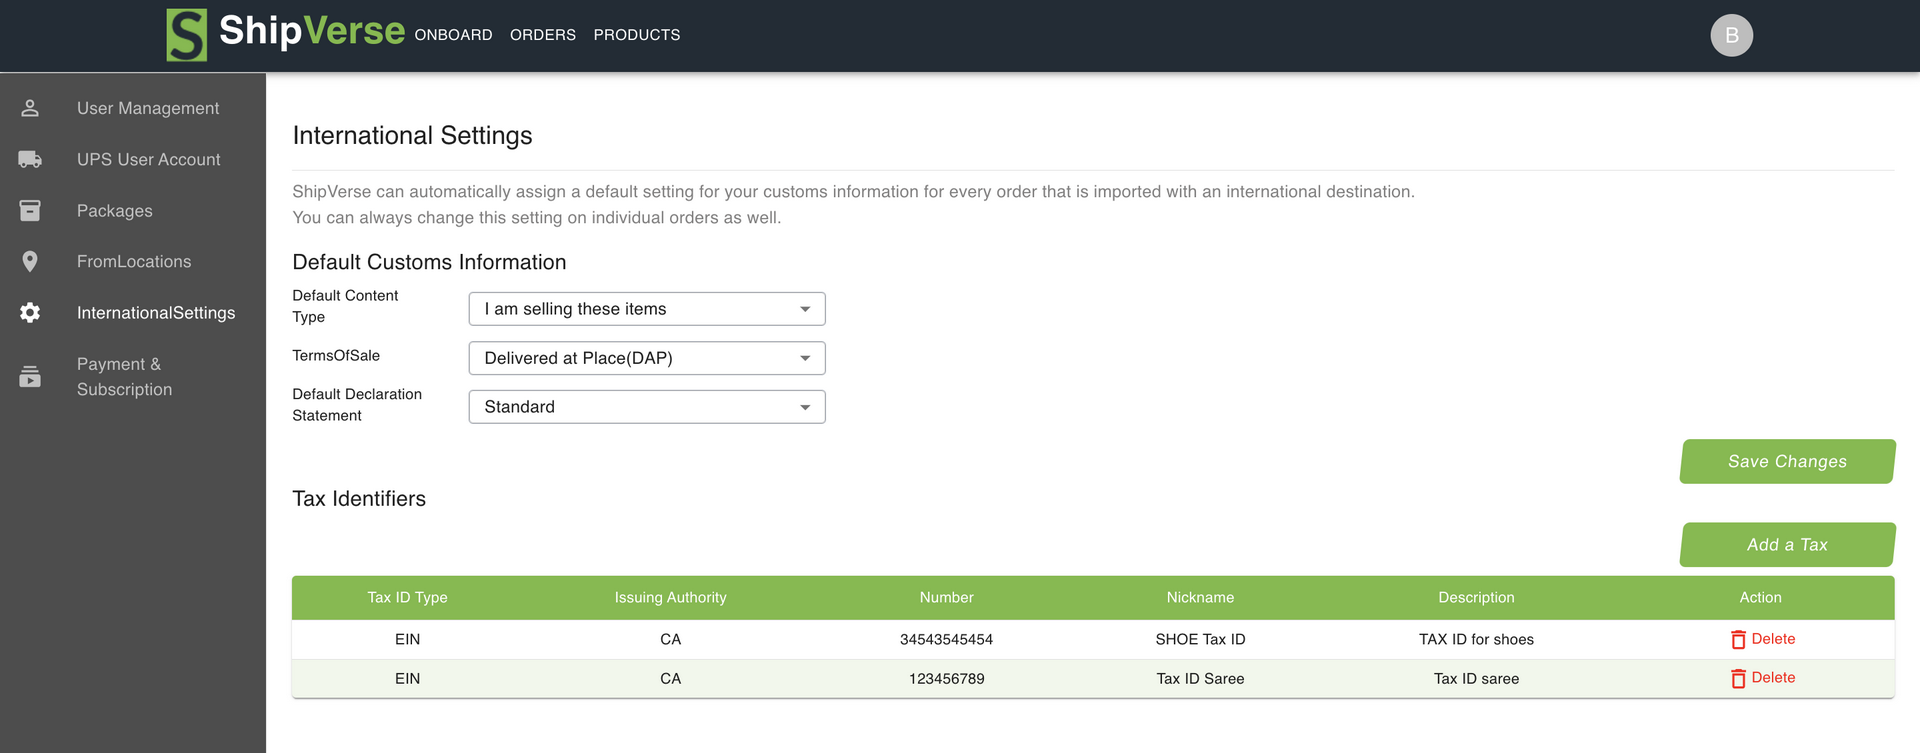
To go to international settings, go to "Settings" menu in your account profile. Select default customs information according to your needs. Once default information is entered, click on save.
Provide "Tax Identifiers" to select from, while placing an international order.
Save Package dimensions
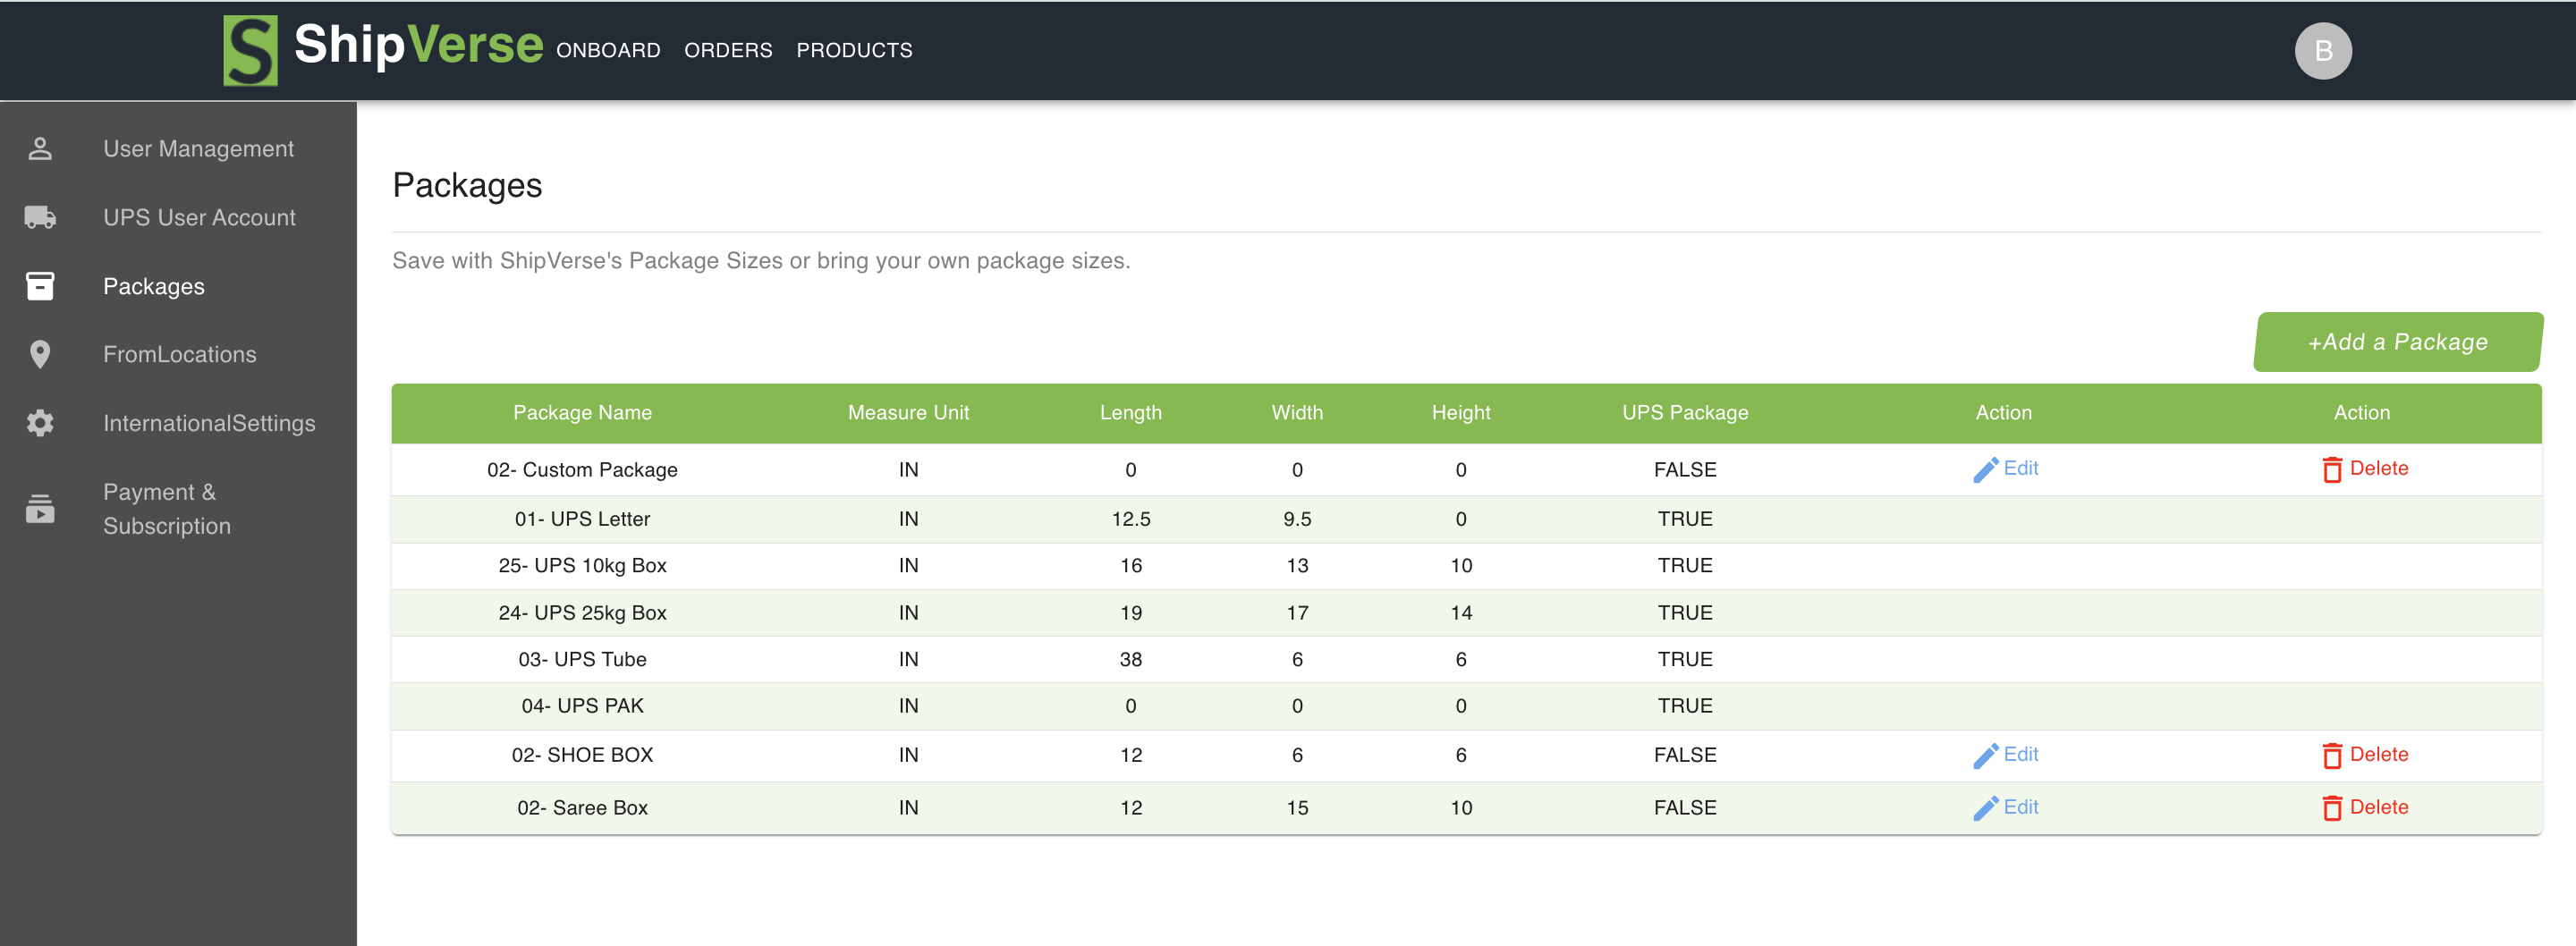
To provide default custom package dimensions, go to "Settings" menu in your account profile and select "Packages" option. Select "+Add a Package" to add package dimensions. Provide all details in the pop up window and click on save to save your changes. Now, while shipping order, select name of your saved package dimension in "Package Code" to avoid entering package dimensions of same package every time.
Payment and Subscription
To go to "Payment and Subscription" tab, visit "Settings" menu in your account profile and select "Payment and Subscription" option. Select the preferred subscription plan and pay using your credit card.
You are all set!!
created with
Website Builder Software .